I wrote this guide for a friend who had a prototype and wanted to ship a real product without burning too much cash. It may be helpful to others, so I’m publishing it here. I’ll keep it general and avoid too many specifics.
Ten years ago, this might have sounded naive, but in 2024 it is entirely feasible for a skilled individual or a small team to design, manufacture, and distribute electronics in small volumes.
Why is this possible today?
Mainly because of the rise of fast turnkey printed circuit board assembly shops with massive, in-house inventories of stocked parts. I cannot overstate the impact this has had on the fabrication stack. Most of these shops are offshore.
The turnaround times are short. Most of my designs are manufactured and shipped within four days of ordering. Even small batches remain cost-effective.
In practice, this means that an individual without large capital backing can design a product, put it on sale, and only build to order.
If you plan this carefully, you can manufacture a customer’s order only after receiving payment.
I’ll outline the process of designing and just-in-time manufacturing a new product from the ground up, focusing on small runs with limited resources or capital.
Let’s break it down, now that we see why this might be the ideal approach for the right person.
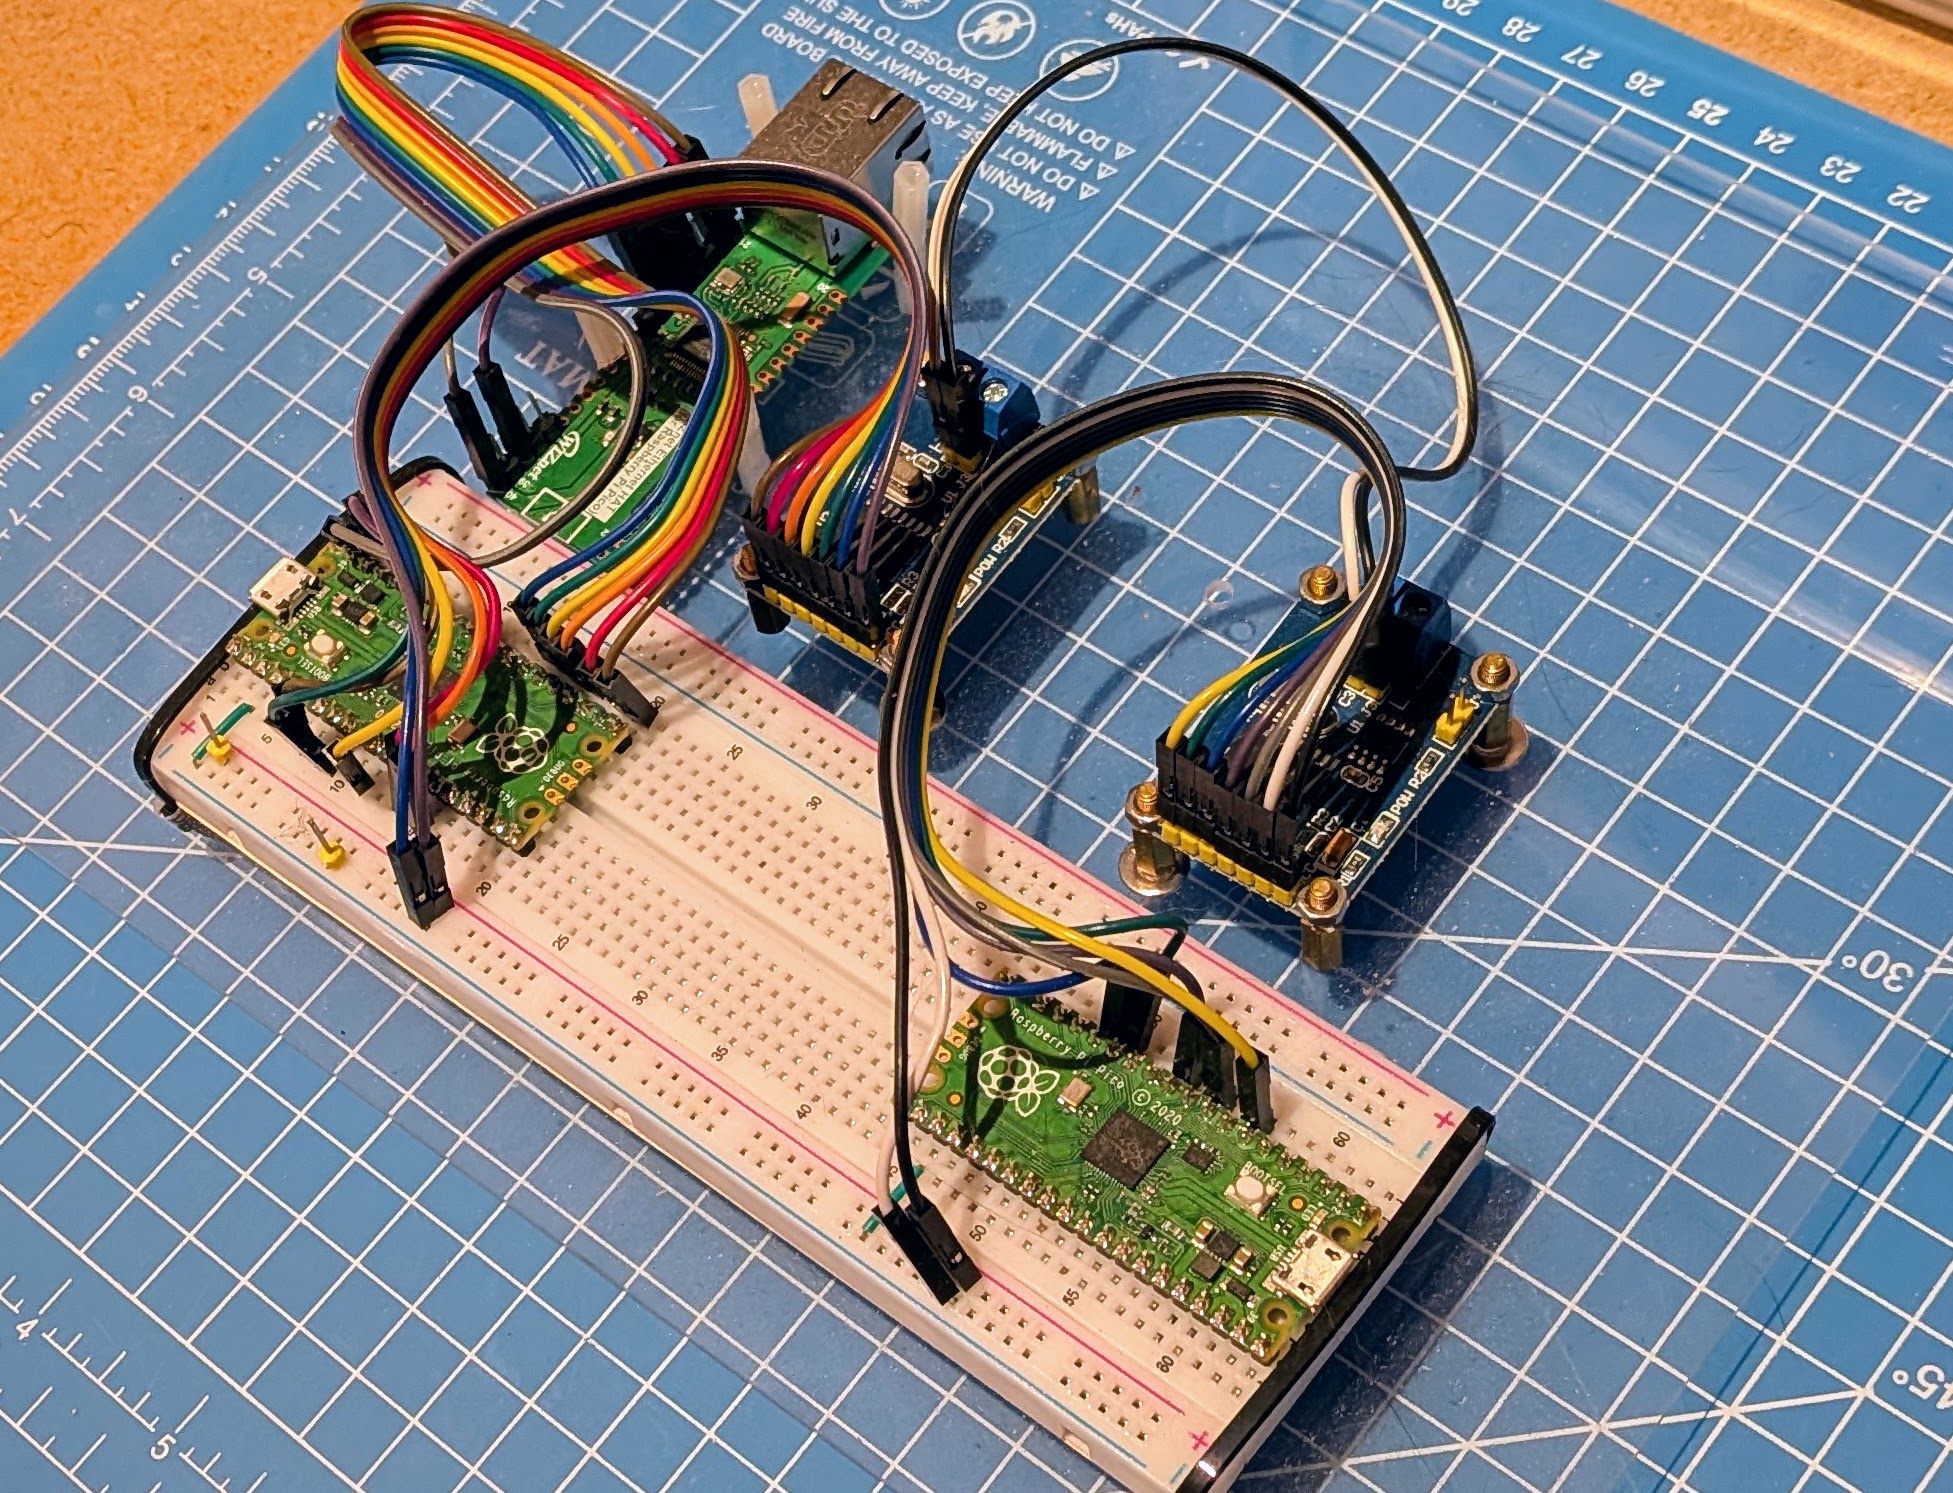
Make your first prototypes using “Frankenboards.”
Use flat cables and connectors to link commercial boards, peripherals, sensors, cameras, and displays. Use as many off-the-shelf parts as possible, prioritizing parts that are easily replicable. That means the schematics are available online or the circuits are simple to recreate.
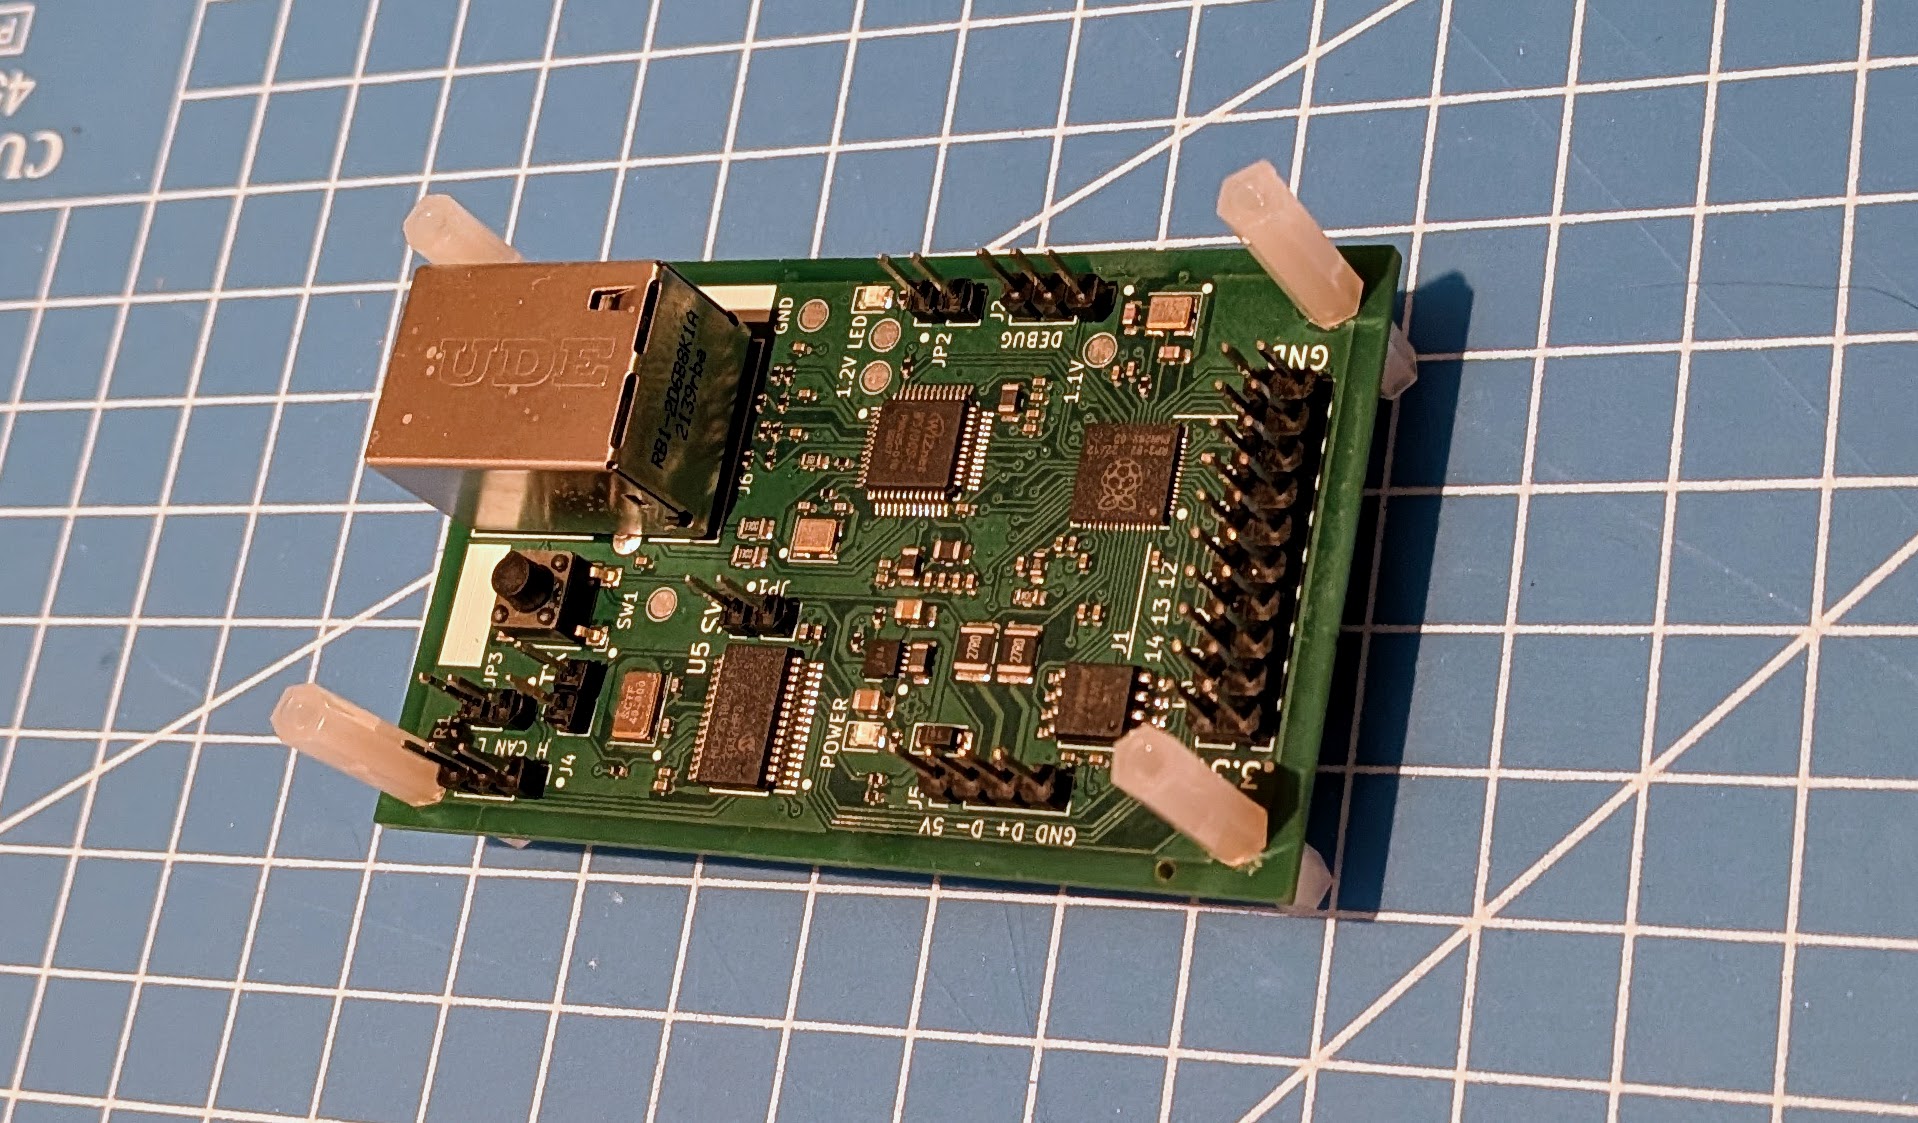
For example, you could choose an RP2040 as your microcontroller and use the RP2040 Pico as your core design. Get the schematics and the BOM (Bill of Materials) from their website. That’s going to give you a blueprint of all the components and connections on their board. Later, you can keep the schematic and reroute the entire Pico onto your own board, integrating it with the rest of your system.
For features you can’t find, make a small board yourself. At this point, I avoid breadboards and prototype small circuits directly in KiCad or Altium, then have them made at a printed circuit board assembly shop.
Use flat cables to interconnect all the modules.
Software is as important as hardware.
Make sure you can install the same microcontroller firmware stack (bootloader, drivers, hardware initialization) as the board you’re basing your design on. Don’t try to design your own firmware at this stage.
If you prototype with an RP2040 Pico, your custom printed circuit board should run the same firmware stack. In this case, that depends on your programming choice:
- If you want C/C++, you use the Pico SDK firmware
- If you want Python, you use MicroPython/CircuitPython firmware
Select your enclosure before designing your board
Once your Frankenboard and off-the-shelf firmware are functional, design your own board. Start by selecting an enclosure. Never design a board without knowing what its enclosure will be. The world of enclosures is an entire topic on its own, so I’ll leave it for another post.
Consolidate the schematics from all the modules of your Frankenboard into a single schematic. At this stage, you’re not designing anything new. You’re proving that a set of separate modules can work together.
Your bill of materials
Generate your first bill of materials. Cross-check all components to ensure they are available for assembly at your manufacturing shop of choice. Find alternatives for any components you can’t source and adjust the schematic as needed. If you have components with no alternatives at your offshore shop, you’ll need to:
- Send them the components for assembly, or
- Buy the components yourself and find a local shop to finish the assembly, or
- Buy the components and assemble them yourself, usually the most practical option for a small batch.
Ideally, you’ll avoid these options by sticking to in-stock components. If you are forced to use one of the options above, expect extra days of lead time.
Sometimes there are specific components you need but can’t find in your shop of choice (generally PCBWay or JLCPCB), so you have to assemble them yourself, usually connectors or power electronics parts like DC/DC converters. In those cases, make sure to get them as through-hole components if you can, much easier to assemble. Avoid hand-soldering surface-mount parts at all costs.
And finally, design your board
Design your board outline based on the selected enclosure. Place all components before routing any traces.
Reroute the board to your own dimensions and specs, essentially redesign the layout to remove unneeded parts and slim it down, adding or tweaking features based on what you want in the final product.
I won’t dive into the design process here, since plenty of excellent books and materials on the internet cover it. Just make sure to add test points and easy access for testing.
Order your first prototypes, test and debug thoroughly, make adjustments, then reorder. Repeat until satisfied.
Now you are ready to release your product to the market.